Conference Badge Design: Create, Print, and Distribute in 6 Easy Steps
A great conference badge design can make a huge impact on your event. The right design:
- Makes a great first impression on attendees
- Helps attendees identify each other
- Serves as a knock-out branding opportunity for your event and organization
Now, if you use Photoshop and mail merge (or, worse, manual input!) for your badge designs, then conference badges might feel like the worst part of your event prep. But the conference badge design process doesn’t have to be complicated.
From getting inspired to managing your attendee info to understanding your printing options, we’ll help you create outstanding conference badge designs for your upcoming events.
What Should Every Conference Badge Include?
Here are the key elements every conference badge should include:
- Conference logo. As an essential branding element, you should clearly display the conference logo on the badge. It helps attendees identify the event and reinforces your organization’s branding.
- Attendee name. Including the attendee’s name on the badge is crucial for networking and introductions. Make sure the font size is large enough for easy reading.
- Attendee role. Adding the attendee’s role and company name is another way to encourage networking and break the ice between attendees.
- QR Code. You can use QR codes to link to info about attendees, sessions, or the event as a whole. Exhibitors and sponsors can also use the QR codes to add leads to their sales pipeline by scanning attendee information right at their booths.
- Snazzy design. A great design can make your badge stand out and add to the overall event aesthetic. Even better: it can turn a badge into a keepsake, which is the type of brand marketing you just can’t pay for.
- Conference badge ribbon. Conference badge ribbons are a popular way to add additional information to badges. They can be used to highlight the attendee’s role, sponsor status, or other special designations.
When it comes to conference badge design, there are really only two rules: be eye-catching and be useful.
Once you’ve got those, you’re good to go.
Recommended Resource: 📺 Do you want to learn how to make the most of your resources and create a seamless experience for your attendees? Watch 8 short videos to learn how you can easily design and deliver in-person events that engage attendees and offer sponsors more value.
How Do I Choose a Badge Designer?
You don’t want to be stuck in the weeds of an overly-complicated badge designer. The risks are too high! Manually adding names? Designing from scratch? Not today.
When you’re figuring out how to manage your conference badge design, consider these questions:
- Does the badge designer sync with registration data? Your event badge designer should either sync with your event registration data or be part of the same event management system. That way, you can pull attendee, speaker, and sponsor information to automatically generate badges. This can save you literal hours and reduce the risk of errors.
- Does the designer have pre-built templates? Some conference badge designers offer pre-built templates that you can customize with your company’s branding and event information. AKA a massive relief if you’re short a graphic designer.
- Is it easy to customize the conference badge’s design? If you have a specific design in mind, look for a badge designer with built-in, non-designer-proof customization. This looks like drag-and-drop functionality, a user-friendly interface, and the ability to upload custom graphics.
- Can you create bulk badges? If you have a large event with hundreds or thousands of attendees, look for a badge designer that allows bulk badge creation. There is no reason for you to have to do this one by painful one!
Want to jump into an easy-to-use badge designer?
EventMobi’s Badge Designer is built right into the event management platform. It’s perfect for event planners who need hundreds of badges, without a graphic designer in sight.
Not only is your attendee data automatically synced to your badge design tool, but you can also choose from prebuilt templates, customize badges, and create badges in bulk. Plus, it’s built right into an event experience manager with everything you need to run in-person, virtual, and hybrid events.
Chat with our team to see if EventMobi can make your badge design process easier, or watch the video below to learn more 👀
6 Steps for Great Conference Badge Design
So you’ve chosen your conference badge designer.
Now, the moment of truth: designing the world’s most beautiful badge. (Okay, okay. At least a really solid one.)
Here are the six steps you can take to design, create, and distribute your conference badges.
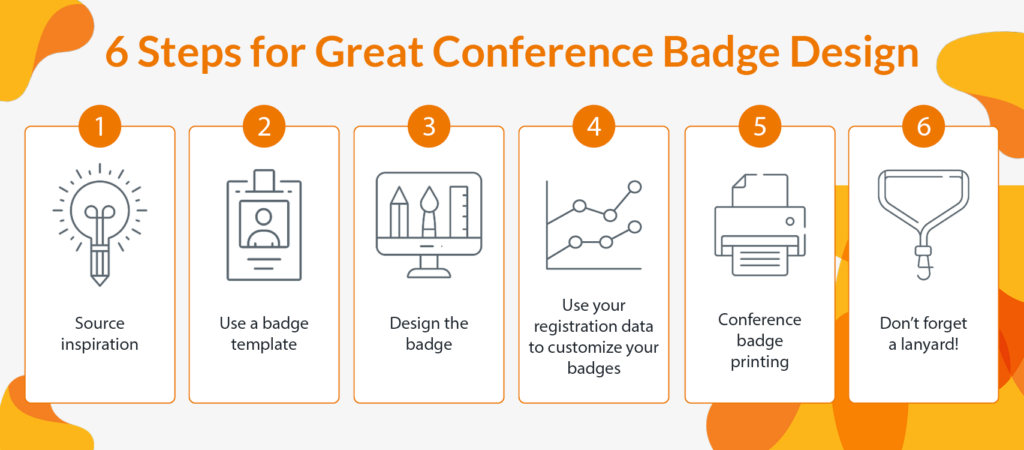
Step 1: Source inspiration
Before you start designing, you need inspiration! Here are some suggestions to get you started on how to design a conference badge:
- Browse Pinterest. Pinterest is a great resource for design inspiration. You can search for conference badges or event branding to see what other organizations and events have done.
- Revisit past designs. If you’ve hosted events in the past, take a look at your previous conference badge designs to see what worked well and what didn’t. (Bonus points: Check out your event surveys and search for “badge” to see if you have any qualitative info!)
- Check out similar organizations. Look at what other organizations are doing for their conference name badge design! It’ll help you differentiate your event while meeting attendee expectations.
- Organize a brainstorming session. Get the team together! Invite your key stakeholders and executors in a room to bring all your research together, gather ideas, and set your final direction. This ensures your conference badge design aligns with your organization’s branding and event goals.
Step 2: Use a badge template
Like we said above, a pre-designed badge template is an awesome tool. But if you need more tailored designs, custom badge templates may be the way to go.
Here’s a look at both:
- Pre-designed templates. This can be a great option if you’re short on time or design expertise. Simply upload your logo, choose your colors, and select the information you want to display on the badge.
- Custom templates. Have a designer? A specific vision? You might need a custom template. That way, you’ll have more control over the design choices and layout for your badge.
Step 3: Design your badge
Once you have a template in place, it’s time to start designing your conference badge. Your badges should be a cohesive part of the overall look and feel of your event, so you want your design to reflect your event or organization’s unique visual identity. But it’s important to balance art with function!
When designing your event badge, ask yourself:
- Is it readable from a distance? Name badges for conferences should be easy to read from afar, so attendees can quickly identify each other and network effectively.
- Are the font sizes large enough? Make sure that the attendee’s name is the largest text on the badge, followed by their role and any other key information.
- Is there a clear information hierarchy? A clear hierarchy of information helps attendees quickly identify important details. For example, you could use different font sizes or colors to distinguish between the attendee’s name and role.
- Is there a QR code? Including a QR code on your badge can make it easy for attendees to connect with each other and access event information. Just be sure to test the QR code before printing to ensure it works properly.
- Is the conference badge design keepsake material? A well-designed badge can serve as a keepsake for attendees and promote your event long after it’s over. Consider incorporating design elements like your event logo or a unique color scheme to make your badge stand out.
- Have you added the right sponsors? If you have event sponsors, including their logo on the badge can help increase sponsor visibility and recognition, while also adding visual interest to the badge design.
Step 4: Use your registration data to customize your badges
You should never have to use mail merge again! At least, not for a conference badge.
As mentioned earlier, EventMobi and similar platforms come ready to sync your attendee, exhibitor, and sponsor information with your badge design tool. Even better, if you use EventMobi’s event registration and website builder, your attendee data is already available in the Badge Designer.
With the registration data in your Event CMS, you can to print attendee info–like name, role, and attendee type–directly on your badges without any extra effort. This makes it simple to manage event badging at scale and customize your designs with relevant attendee, staff, and speaker details.
Step 5: Conference badge printing
Once you’ve designed your conference badges, it’s time to start thinking about your options for event badge printing. How you choose to handle badge printing will depend on several factors, including the size of your event, the type of check-in experience you want to provide, and your event budget.
Let’s take a look at some of the best solutions for badge printing:
Pre-Printed Badge Ordering
Want to pre-print your event badges but are short on time or resources? It’s not easy to find a print shop for last-minute orders and doing it all yourself (printing, laminating, cutting, stuffing) requires more time and energy than you might have to spare.
With EventMobi’s Pre-Printed Badge Ordering, printing your badges is effortless and affordable. Use Badge Designer to create your design, place your order, and get event-ready badges delivered to your office or venue–within five business days!
Live Badge Printing
For larger events or those with a more complex check-in process, you may want to consider printing badges directly on-site. EventMobi offers Live Badge Printing solutions that streamline the check-in process, minimize wait times, and leave a great first impression on your attendees.
Plus, Live Badge Printing allows you to handle walk-ins without missing a beat.
Step 6: Don’t forget a lanyard!
Once you’ve designed and printed your badges, your attendees need a way to wear them with style! Here are some common options for conference badge holders:
- Lanyard. The classic option is a lanyard that goes around the neck. You can customize the lanyard with your conference branding or add sponsor logos for extra exposure. This is a huge opportunity for visibility since every single attendee will be wearing it around their neck for the entire event!
- Ribbon. Conference badge ribbons are a unique alternative to lanyards. They attach to the bottom of the badge and can include additional information like the attendee’s role or company.
- Safety pin. If you’re looking for a low-cost option, safety pins can work in a pinch. They attach to the back of the badge and can be fastened to clothing.
If your badges are more delicate, pair them with high-quality conference badge holders. And don’t forget that the lanyard or ribbon is another opportunity to showcase your branding or sponsor logos. Make sure to take advantage of this real estate!
BONUS: Use your conference badge design tool to create nameplates for speakers and panelists
If you’re looking for an easy way to create nameplates for your panelists and speakers, your conference badge design tool can do the trick!
EventMobi’s VP of Product Marketing, Thorben Grosser, shares a clever hack to help create nameplates with the Badge Designer. By selecting your badge size as A4 and adding a templated design from a free design tool like Canva, you can easily create nameplates without the inconvenience of copying names into a document page by page.

Check out the video above for a step-by-step guide to creating nameplates using your event badge software.
Make Badging a Breeze with EventMobi
If you’re looking for a hassle-free way to create stunning conference badges for your next event, EventMobi is a great option! With the Badge Designer and Pre-Printing Badge Ordering built right into the platform, you don’t need to be an experienced visual designer or have a big budget to create professional-looking badges.
Here’s a quick overview of how EventMobi can streamline your badging from collecting registrant data to creating the perfect design to hassle-free printing:
- With EventMobi’s event registration platform, your attendee data is already available in your Event CMS–and ready to print right on your badges
- The drag-and-drop Badge Designer offers pre-built templates and gives you plenty of creative freedom when it comes to customizing your design
- With Pre-Printing Badge Ordering, you can get laminated, ready-to-wear event badges sent straight to your venue in just 3 clicks! That’s all there is to it–no dealing with the printshop, no badge stuffing, no hassle. Your pre-printed badges will arrive within 4 business days!
Wanna upgrade your conference experience? 🖨️ Get in touch to explore EventMobi’s badge design and printing solution today!